Best Safety Practices for Brick Repair Projects
Have you ever wondered how to safely tackle a brick repair project? Whether you’re fixing a crumbling wall or replacing a few bricks, safety should always come first. In fact, according to the U.S. Bureau of Labor Statistics, falls and injuries related to heavy lifting are some of the top causes of accidents in DIY projects. So lets dive into the best safety practices for your next brick repair project!
Why is Safety Important in Brick Repair?
When you think about brick repair, safety might not be the first thing that comes to mind. But it should be! Brick repair involves heavy materials, sharp tools, and sometimes working at heights. Each of these can pose a risk if you’re not careful.
By focusing on safety, you not only protect yourself but also ensure that your project goes smoothly. Remember, a safe project is a successful project!
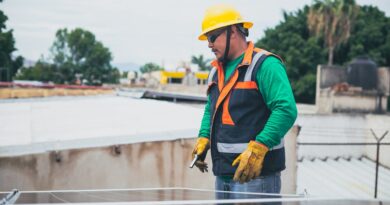
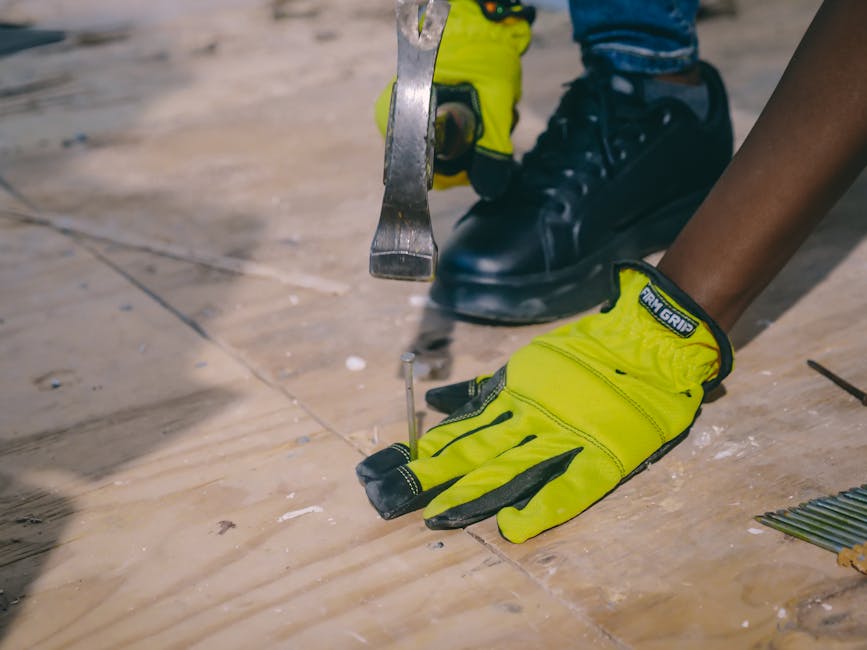
What Safety Gear Do I Need?
Before you pick up a trowel, lets talk about safety gear. Here are the basics:
- Safety Glasses: Protect your eyes from dust and debris.
- Gloves: These will keep your hands safe from sharp edges and rough surfaces.
- Hard Hat: If you’re working on a wall that’s over your head, this is essential.
- Sturdy Boots: Choose boots with good traction to prevent slips and falls.
- Dust Mask: If you’re sanding or working with mortar, protect your lungs.
How Should I Prepare the Work Area?
Preparation is key. A cluttered workspace can lead to accidents. Heres how to set up your area for success:
- Clear the Area: Remove any obstacles or tripping hazards. Keep the ground clean.
- Use Barriers: If you’re working on a larger project, consider using cones or tape to mark off areas.
- Have First Aid Ready: Always have a first aid kit nearby in case of minor injuries.
By organizing your workspace, youll reduce the risk of accidents. This simple step can make a big difference!
What Tools Do I Need for Safe Brick Repair?

Using the right tools is crucial for safety and efficiency. Here’s a list of essential tools for brick repair:
- Trowel: Use for applying mortar and smoothing surfaces.
- Chisel and Hammer: Great for removing old or damaged bricks.
- Level: Ensures that your wall stays straight.
- Measuring Tape: Accurate measurements are vital.
- Brick Saw: If you need to cut bricks, a saw designed for this purpose is essential.
Always inspect your tools before use. Damaged tools can lead to injuries.
How Do I Handle Heavy Materials Safely?
Bricks are heavy, and lifting them can strain your back. Here are some tips to lift and carry bricks safely:
- Bend Your Knees: Always lift with your legs, not your back.
- Keep It Close: Hold the bricks close to your body to reduce strain.
- Get Help: don’t hesitate to ask someone to help with heavy loads.
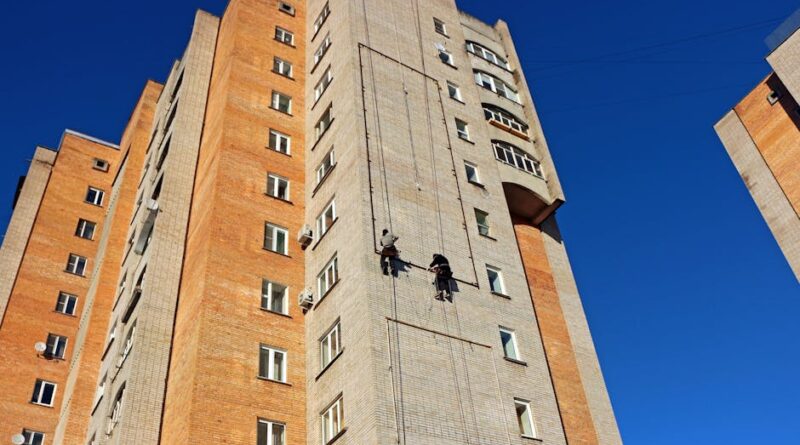
What Should I Know About Working at Heights?
If your brick repair project involves working on a ladder or scaffolding, safety becomes even more critical. Here are some guidelines:
- Choose the Right Ladder: Make sure it’s rated for the weight you will be using.
- Stable Base: Ensure the ladder is on a flat surface and secure it if necessary.
- Maintain Three Points of Contact: Always have two hands and one foot, or two feet and one hand on the ladder.
Working at heights can be dangerous, but following these practices can help keep you safe.
What Are the Risks of Using Mortar?
Mortar is an essential part of brick repair, but it comes with its own risks. Heres how to use it safely:
- Wear Gloves: Mortar can irritate your skin. Protect your hands!
- Ventilation: Always work in a well-ventilated area to avoid inhaling dust.
- Follow Instructions: Mix the mortar according to the manufacturer’s instructions for safety and effectiveness.
By taking these simple precautions, you can avoid common pitfalls when using mortar.
How Can I Prevent Common Injuries?
Injuries can happen even to the most careful DIYer. Here are some common injuries and how to avoid them:
- Cuts and Scrapes: Always wear gloves to protect your hands. Use tools properly to reduce the risk.
- Strains and Sprains: Use proper lifting techniques and take breaks when needed.
- Falls: Secure ladders and use scaffolding carefully to prevent falls.
Taking these precautions can help you stay safe and complete your project without incident.
What Should I Do in Case of an Emergency?
Even with all precautions, accidents can happen. Heres what to do in case of an emergency:
- Stay Calm: Take a deep breath to assess the situation.
- Call for Help: If someone is hurt, don’t hesitate to call 911 or your local emergency number.
- Provide First Aid: If trained, offer first aid while waiting for help.
Being prepared for emergencies can save lives and minimize injury.
How Can I Wrap Up My Project Safely?
Once your brick repair project is completed, it’s important to clean up safely. Heres how:
- Dispose of Debris: Use a proper disposal method for any waste materials.
- Store Tools Safely: Return tools to their proper place to avoid injuries later.
- Inspect the Area: Make sure the workspace is clear of hazards before leaving.
Cleaning up may seem tedious, but it’s a crucial step to ensure the area remains safe.
Final Thoughts on Brick Repair Safety
Safety should always be your top priority in any DIY project, especially when working with bricks. By following these best practices, youll protect yourself while achieving great results. Remember, a safe project is an enjoyable project!
So, the next time you grab your tools for a brick repair project, keep these safety tips in mind. Youll not only complete your project efficiently but also ensure a safe working environment for yourself and others.
For more tips on DIY projects, check out our related post on 10 Tips for DIY Home Improvement.
Stay safe, and happy repairing!